What is V-ray ? This beginner tutorial explains about this plugin and how its different settings gives us realistic results when installed in 3dsmax. to understand the different materials and lights are used you could try this tutorial yourself.
This 3ds Max Tutorial is by CG artist, Jan K. Vollmer.
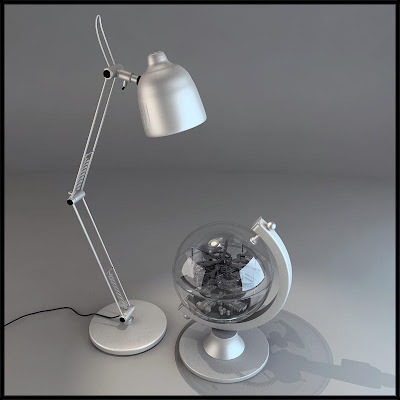
In this tutorial I want to show the making of the image “time is running” made with 3ds max 2008, rendered with vray 1.50.SP1.
Everything is modelled in 3ds max 2008 mostly from standard geometry and some splines with lathe like the lampshade. Modelling is not my favourite so I want to show the material and the scene and rendering setup with vray 1.5.SP1.
First of all I build some kind of a studio surrounding with making a concave fillet and bend it a little to get a fourth of a cycle. So get enough studio walls around the objects. Be sure to make it big enough.
Then I start the modelling. Everything was made from standard forms in max and nothing special. I almost did not use textures, because I wanted to create real metal materials and silver effects. Just the little factory inside has textures like the ground and some buildings.
Wire of the whole Scene
Close-up of the clockwork
Close-up of the Lamp
The next step is to set up the materials for the different metal objects, the glass and the factory. I used the standard vray advanced materials and modified them for the five Basic materials in my scene.
The chromium material:
A standard vray material with a light gray colour in the reflection, refl. Gloss of .71, subdivision of 12 to get nice results but still short render time. The IOR is at 2.97 and I used ward.
The glass material:
In the reflection slot is a falloff map set to standard and fresnel. Ref. Gloss. Is set to .98, IOR is at 1.517 and set the affect shadow and alpha to get nice shadows on the ground. The fog colour is set to white.
The light material:
Just a simple vray light material that is set to a warm light orange colour and with a multiply of 6 to get a bright effect. Instead of a real bulb I used a sphere with the light material applied to get the light emission.
The hdri reflection map:
This is a map I use very often for interior scenes. I set the overall multi. to 3.0, made a spherical environment and a vertical rotation of 75 deg. To get the ground of the map really on the ground, I put that map in the environment reflection slot in the vray over right slot.
The silver material :
Silver material is very similar to the chromium; it has just a much brighter reflection colour and a almost black diffuse. I also set the refl. Gloss. to .95 for high reflections. The IOR is at .18 for silver.
The light material and HDRI Map
The next is the light set up of my studio. I put two vray plane lights in the scene, one from the right hand side with a blue colour and a multiplier of 5, set it to invisible and the subdiv to 25. The second light I set on the left hand side of the objects to have some light from the opposite side. Here i used a warm colour and a multiplier of 2 to get a soft back light. Subdivs are also at 28. in the vray light properties i set up the diffuse subdivs to 1500 for all lights in the scene to get a nice soft diffuse effect.
The studio lighting setup
Check the VRay Lights Setting Below
Rendering setup For Scene
I made some standard setups like switch of the default lights and hidden lights.I used adaptive subdivision for faster renderings and catmull-rom for sharp edges. For the environment I used a warm colour and the hdri reflection map with the multiplier of 1.For more contrast I set the colour mapping to hsv exponential with the dark multiplier of .5 and the bright to 2.0.
Be shure to switch sub-pixel mapping on to reduce the highlight sparcel effect in the bright colours. The same for clamp output and affect background.
The render setup part1
Before I finally render the image I do some test renderings with low adjustments like ir-map to low and light cache to 100. If everything is like I want it, I push up the settings to custom for the ir-map and a higher light cache of 500 and a sample of .005m. The vray render region is set to 32 for exact rendering. Also set the low threat priority for better performance. I used distributed rendering to render much faster and skip the waiting time. Here is a small intro:
Install on all slaves the vray render node for distributed rendering and set the ip address of the master as render host. Start the vray spawner for distributed rendering. Make sure that the mappings and textures you are using are locates on a server were all the slaves have a connection to. It all so has to be the same device letter like on the master machine (Z:\3dsmax2008\mapingfolder\...) If you have the option “check for missing files” switched on, vray is looking on every slave for the connection and will tell you if anything is wrong. To check for the files I use the asset tracking function in max to relocate the missing files.
And below is the render setup part 2 , and 3
The Final Image
I hope you find this “making of” interesting and you get some help or inspiration from here. All the best and thanks for reading!
Author: Jan K. Vollmer
Website: www.jankvollmer.de
Email: jkv@elberfeld.de


1 comments:
cool stuff
Post a Comment
Your precious comments/critics will help this site improve